
Ultramarines vs Deathguard (2,000 points)
This was my first time out vs the Deathguard, and my first time playing my opponent.
We had decided on the day to go for a friendly list, and I built one that is friendly (not too over the top or anything) but it did include Guilliman, and 63 marines of one description or another.
The Ultramarines Army List:
Super Heavy Auxiliary
Roboute Guilliman (Warlord - Adept of the Codex)
Battalion
HQ
HQ
Space Marine Captain (with Chapter Master Stratagem), Power Axe & Plasma Pistol & Santic Halo relic
Librarian, Storm Bolter, Force Sword, Null Zone, Might of Heroes, Veil of Time, Smite & Relic of +1 Power
Troops
Tactical Squad (10), Combi Plasma, Plasma Gun, Heavy Bolter
Scout Squad (10), Camo Cloaks & Sniper Rifles
Intercessor (10), Auto Bolt Rifles, Auxiliary Grenade Launcher x 2, Power Sword
Elites
Sternguard Veteran Squad (10), Special Issue Boltgun x 8, Heavy Bolter x 2
Sternguard Veteran Squad (9), Special Issue Boltgun x 7, Plasma Gun x 2
Fast Attack
Inceptor Squad (3), Assault Bolters x 6
Heavy Support
Devastator Squad (7), Rocket Launcher x 4
Dedicated Transport
Drop Pod, Storm Bolter
Drop Pod, Storm Bolter
The Captain has the upgrade for obvious ignore reasons as he can ride down in a Drop Pod, increasing the effectiveness of the Sternguard, Drop Pods & Inceptors giving me a fully offensive and defensive force.
From a Fluff perspective I take the responsibility of that stratagem being given to the captain as he is being observed & tested by Guilliman - maybe a future Tetrarch in the making?
With smart positioning (which I didn't try for in this game) you could get some Guilliman buffs on that force, but this option seems to work well.
The Deathguard Army List:
Friday (Warhammer 40,000 8th Edition) [108 PL, 1957pts]
Battalion Detachment +3CP (Chaos - Death Guard)
HQ Daemon Prince of Nurgle - Blades of Putrefaction, Malefic talon, The Suppurating Plate, Wings
Troops Nurglings - 3x Nurgling Swarms
Plague Marines - 7 x Plague Marines (Champion with Plasma Gun & Power Fist), 2 Blight Launchers
Plague Marines - 5 x Plague Marines (Champion with Plasma Gun & Power Fist), 2 Plasma Gun
Poxwalkers - 15x Poxwalker Fast Attack Foetid Bloat-drone - Plague probe Myphitic Blight-haulers (3), Bile spurt, Missile launcher, Multi-melta
Heavy Support Plagueburst Crawler - 2x Entropy cannon, Heavy Slugger Vanguard Detachment +1CP
HQ Typhus
Malignant Plaguecaster
Elites Beasts of Nurgle (3)
Foul Blightspawn
Noxious Blightbringer, Plasma Pistol
Tallyman, Plasma Pistol
Deployment & Setup:


Turn 1:
I finished setting up first and we played Spoils of war out of the original missions.
I was lucky with my tactical objectives as I drew Area denial (which can be scored on turn 1) and was pretty much a promised Victory point, and then I got the objective that your warlord (Guilliman) has to achieve, and it was to secure Objective 3, the one 4” away from him, so I lucked out there.

I dropped all of my deep strikers in on my right flank, intent on killing the bloat drone. It took all of the Sternguard, both Drop Pods and the untouched Inceptor squad to kill it though… Deathward are seriously tough!
My main body had moved around and opened fire, my shooting result in one of his little vehicles dying, but no other real damage. You can see below the Tactical objectives I completed this turn.

In his turn 1, he moved his Plague marines towards my deep striking force (only 5 of them) and threw all his shots at the Inceptors, killing two of them.
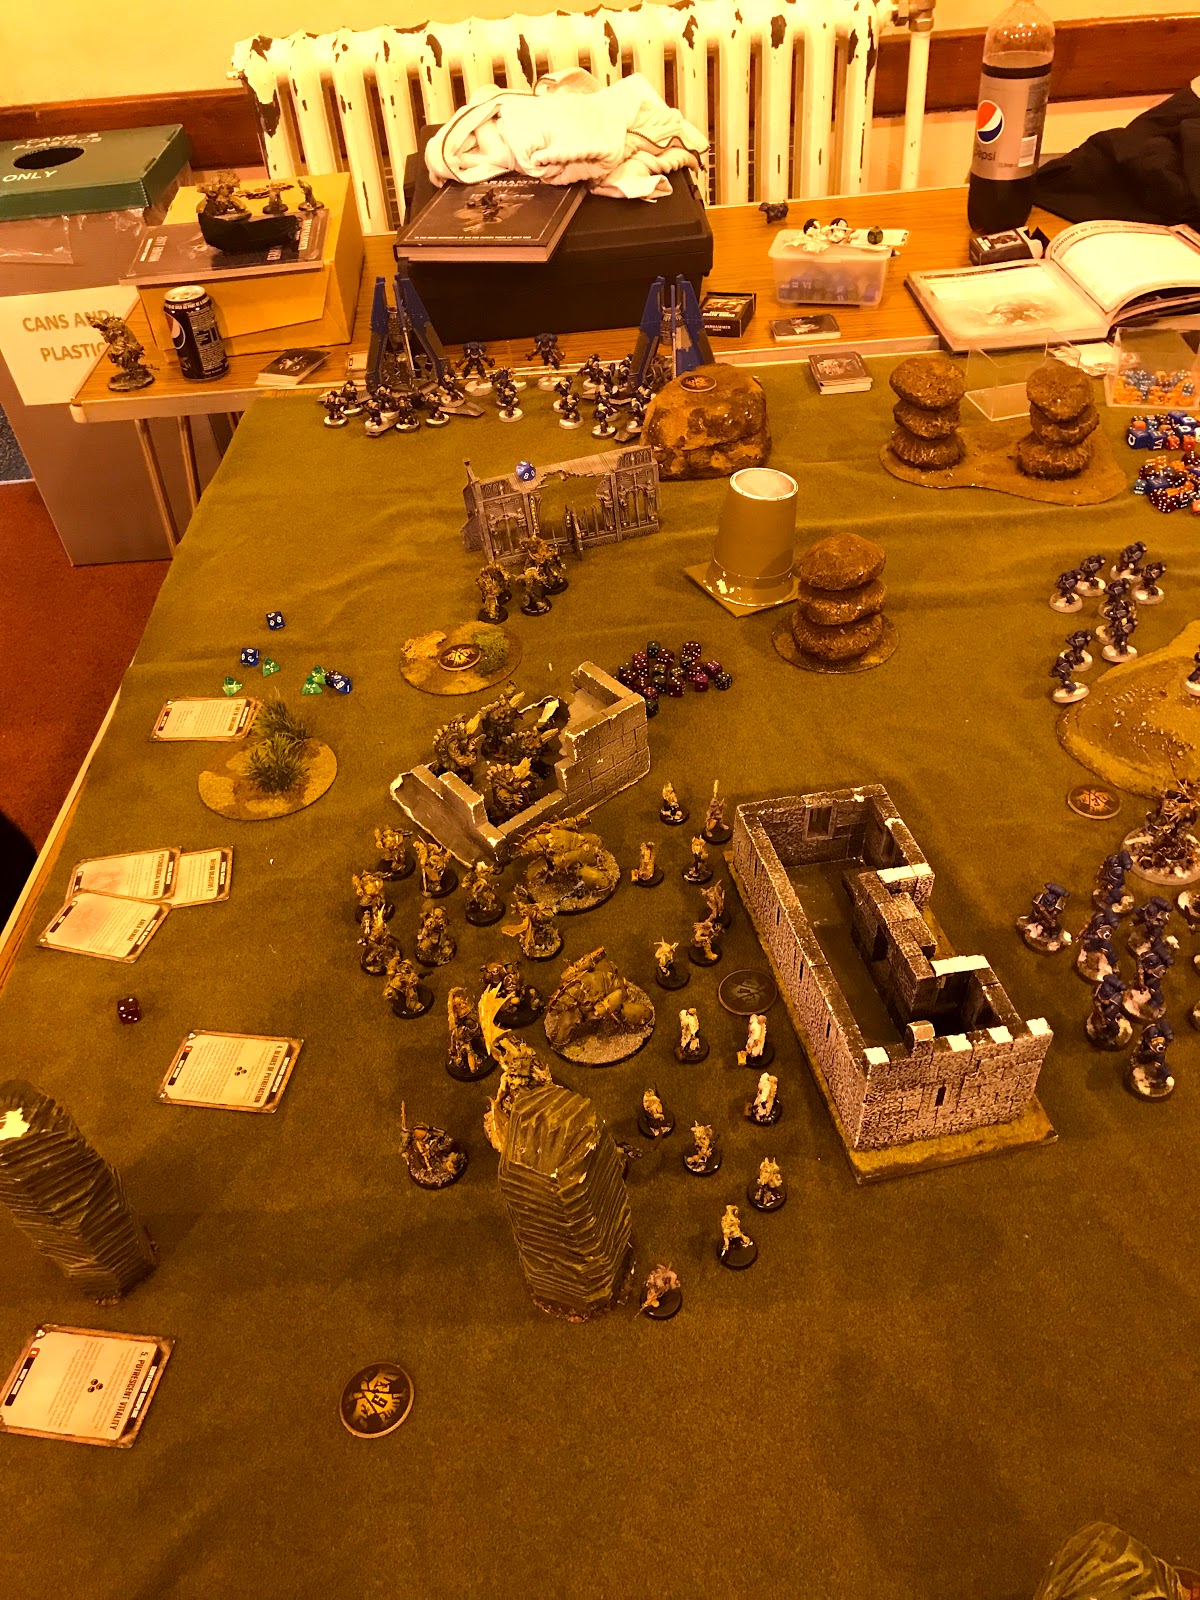
His other shooting managed to kill a couple of tacticals and a scout, overall not a lot of damage though. His Plagueburst crawler did not have a lot of luck with his shots!
Turn 2:
In my turn 2 I killed his 5 plague marines with my deep strikers, and managed to knock out 12 of his pox walkers down, although beyond that I didn't really manage much else!
The Intercessors ended up out of position because of how he remove his casualties... really should have shot them first!
The Intercessors ended up out of position because of how he remove his casualties... really should have shot them first!
His turn 2 had him advance up with his Daemon Prince & Typhus to try and kill my Intercessor squad.


His pox walkers also charged into my tactical marines, but didn't kill any, although one of them survived my attempts to kill them, love the Chapter tactics to fallback and shoot!


Turn 3: (Our final turn due to a late start and interruptions due to the bring and buy sale on at the club).
I advanced Guilliman up to charge the Daemon Prince (as it was his Warlord), while the deep strikers, Rocket Launchers & tactical squad managed to drop 4 of his beasts of Nurgle leaving only one left alive with only 1 wound.
My Scouts once again proved to be a point sink with no bonus failing to do any damage.
Guillimans shooting took two wounds of the Daemon Prince.
Guilliman charges (with Might of heroes active on him), 7 attacks and he is heroically intervened by Typhus, so I decide in my infinite wisdom to split the attacks, 4 with the Sword on the Daemon Prince, and 3 with the fist on Typhus.
Long story short, despite two 6’s to wound vs the Daemon Prince, and 11 wounds getting through the Daemon Prince only loses 4 wounds (he save 7 of 9 normal damage on disgustingly resilient, and failed the 2 from mortal wounds). Typhus only loses 2 more wounds as well leaving both of them on 2 wounds.
The Daemon Prince strikes back and puts 8 wounds on Guilliman, killing him (2 from Mortal, and 6 from three of five failed 3+ inv saves!)
I fail to get Guilliman back up, I fail again with a command re-roll.. I basically threw away my warlord on a bit of a gamble. Now I should have used the Stratagem at this point to give him a final fight phase (and my opponent let me roll the dice to see what would have happened if I had used it - both Typhus & the Daemon Prince would be dead!).
I forgot because I haven't had to use it before, and despite looking at it several times through out the game, we had some external interference that I think (although it could just be me!) distracted me when I should have been paying attention.
In hindsight I think that splitting my attacks was the mistake, but actually by splitting my attacks twice (if I used that Stratagem) I would have been fine... ah well every day is a school day!
In hindsight I think that splitting my attacks was the mistake, but actually by splitting my attacks twice (if I used that Stratagem) I would have been fine... ah well every day is a school day!
The Deathguard Turn 3 was a bit of a challenge for him to make back the VP’s I was on - at this point I had 10, and he had 2.
He managed to kill 8 of my scouts, my Intercessor sergeant, tactical squad and devastator squad, gutting a good chunk of my army - with the Deathguard Tactical Objective of get 1 VP for every 7 models you destroy upto a maximum of 3 VP's - He got 19, just two short of the 21 he wanted.
He also had the gain 3Vp's if you control exactly three objectives, which with sensible movement and some decent kills of my troops he got as well.
He also had the gain 3Vp's if you control exactly three objectives, which with sensible movement and some decent kills of my troops he got as well.
In Review:
Overall a great game, and good opponent, and in hindsight I need to stop going big or go home (as I end up going home!) and should have just flattened his Daemon Prince… one more attack would likely have done it!
The list was quite varied for me, and had a high model count for what I usual use. Looking forward to trying it out again (might be my go to friendly list), although in hindsight I may look at dropping Guilliman as he helped, but wasn't as amazing as he could have been, and for his 385 points I can bring in another Captain or Lieutenant (or both) and another weapons platform to buff up my static force!
David also had some horrific rolls for his Disgustingly resilient on his Bloat drone... I also need to remember that Sternguard are good at killing T4 or less, not so much against T5 or higher!
David also had some horrific rolls for his Disgustingly resilient on his Bloat drone... I also need to remember that Sternguard are good at killing T4 or less, not so much against T5 or higher!
Comments